


https://www.abstractart.live/art-tutorials
Read More
PAINTING UPSCALE ABSTRACTS - LEARN TO PAINT LIKE A PRO!
Beginning Art Tutorial: Painting with Layered Acrylics (Working with glaze mediums)
How to Paint Upscale Abstract Art - Step-by-Step
Read MoreHow to Create an Oil-Like Finish on Acrylic Painting
Featured


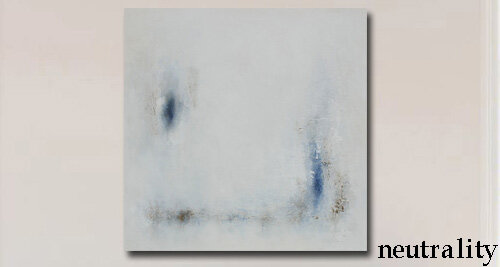
How to Paint with Acrylics: Creating a Large Neutral Artwork
CLASS SEGMENT:
HOW TO ADD A POP OF COLOR TO YOUR ART
Fixing a Trouble Spot in your Painting
MATERIALS USED
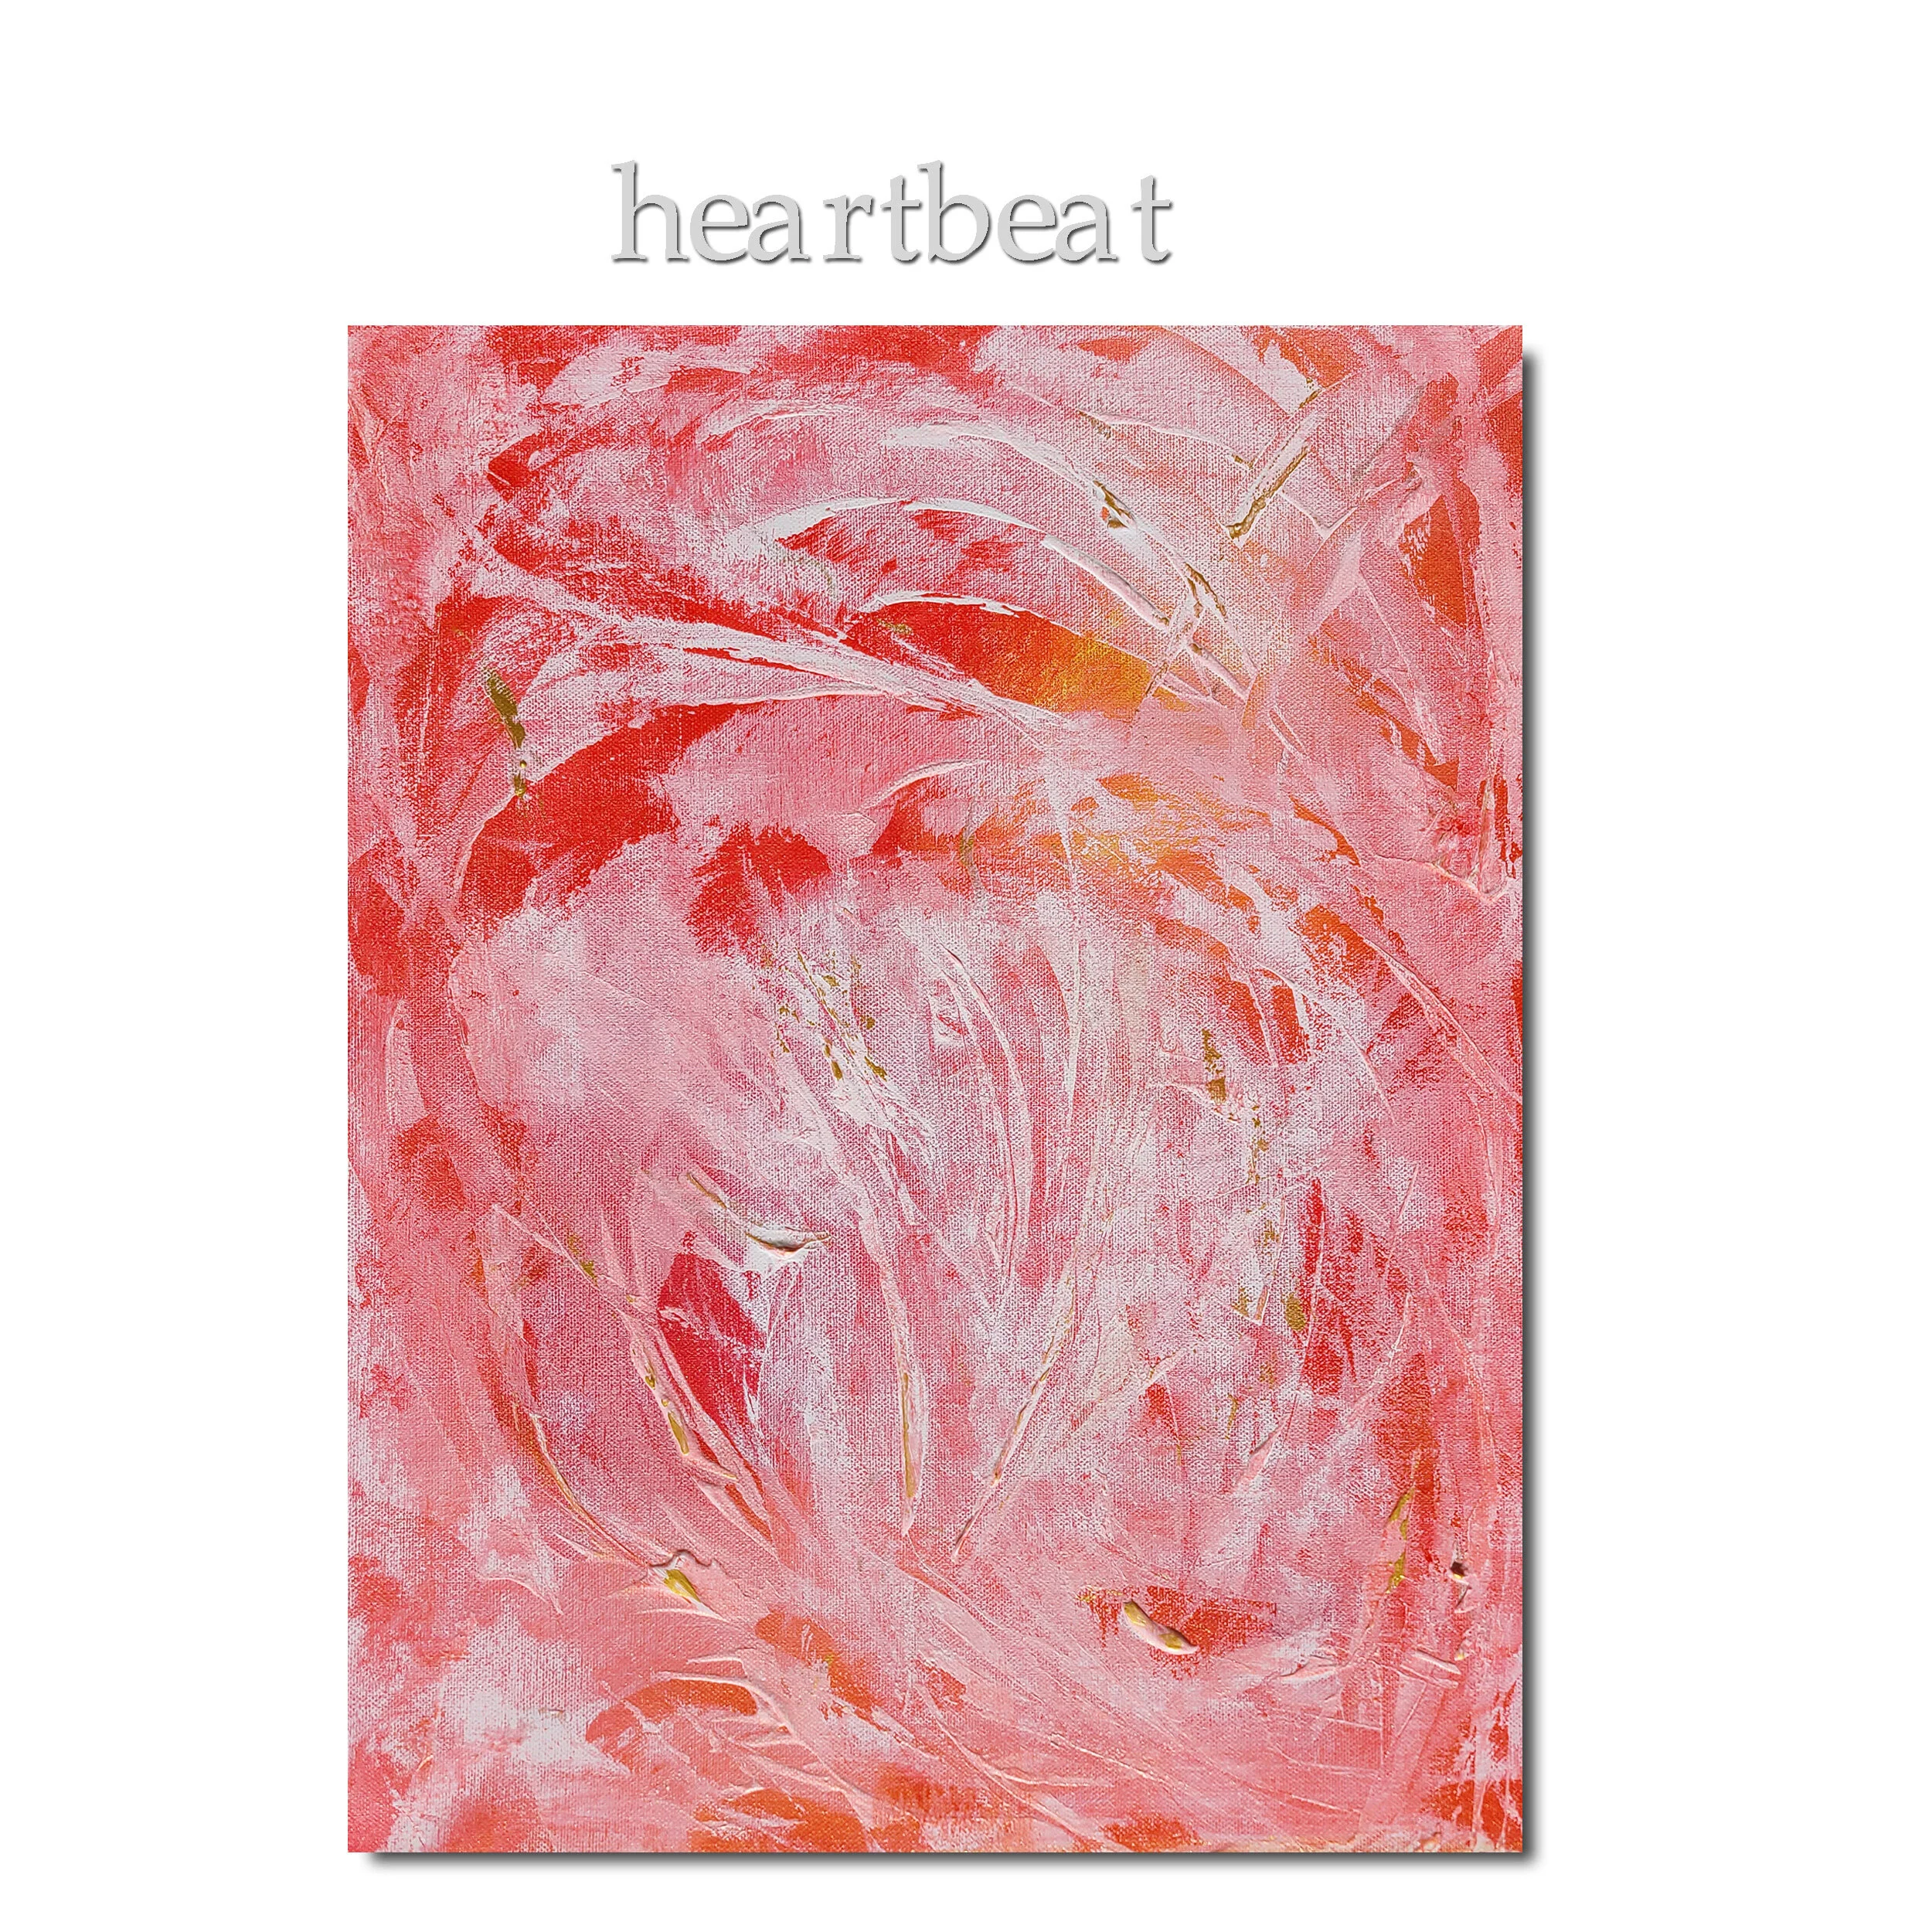
PAINTING: BLISS
MATERIALS LIST:
-See my free techniques tutorials for more info on brushes, mediums-
-Gallery-wrapped canvas (24" x 36")
-Acrylic Glazing Mediums: Satin and Gloss
-Flat brushes
-Utility/blending brushes
-Tissue paper (white)
-Texture paste or gel (the one I use)
-Sponges
-Paper towel
-Acrylic paints: Pthalo Blue/Green Indigo Blue Payne's Grey Turquoise Black or Black Acrylic Ink Titanium White -Water / spray bottle
My favorite and recommended painting surface: A utility table like this one:

*Links to my favorite items above - affiliate links in which I may earn a small commission :)
Learn how to paint this full-scale artwork in step-by-step online instruction:
TAKE TUTORIAL CLASS
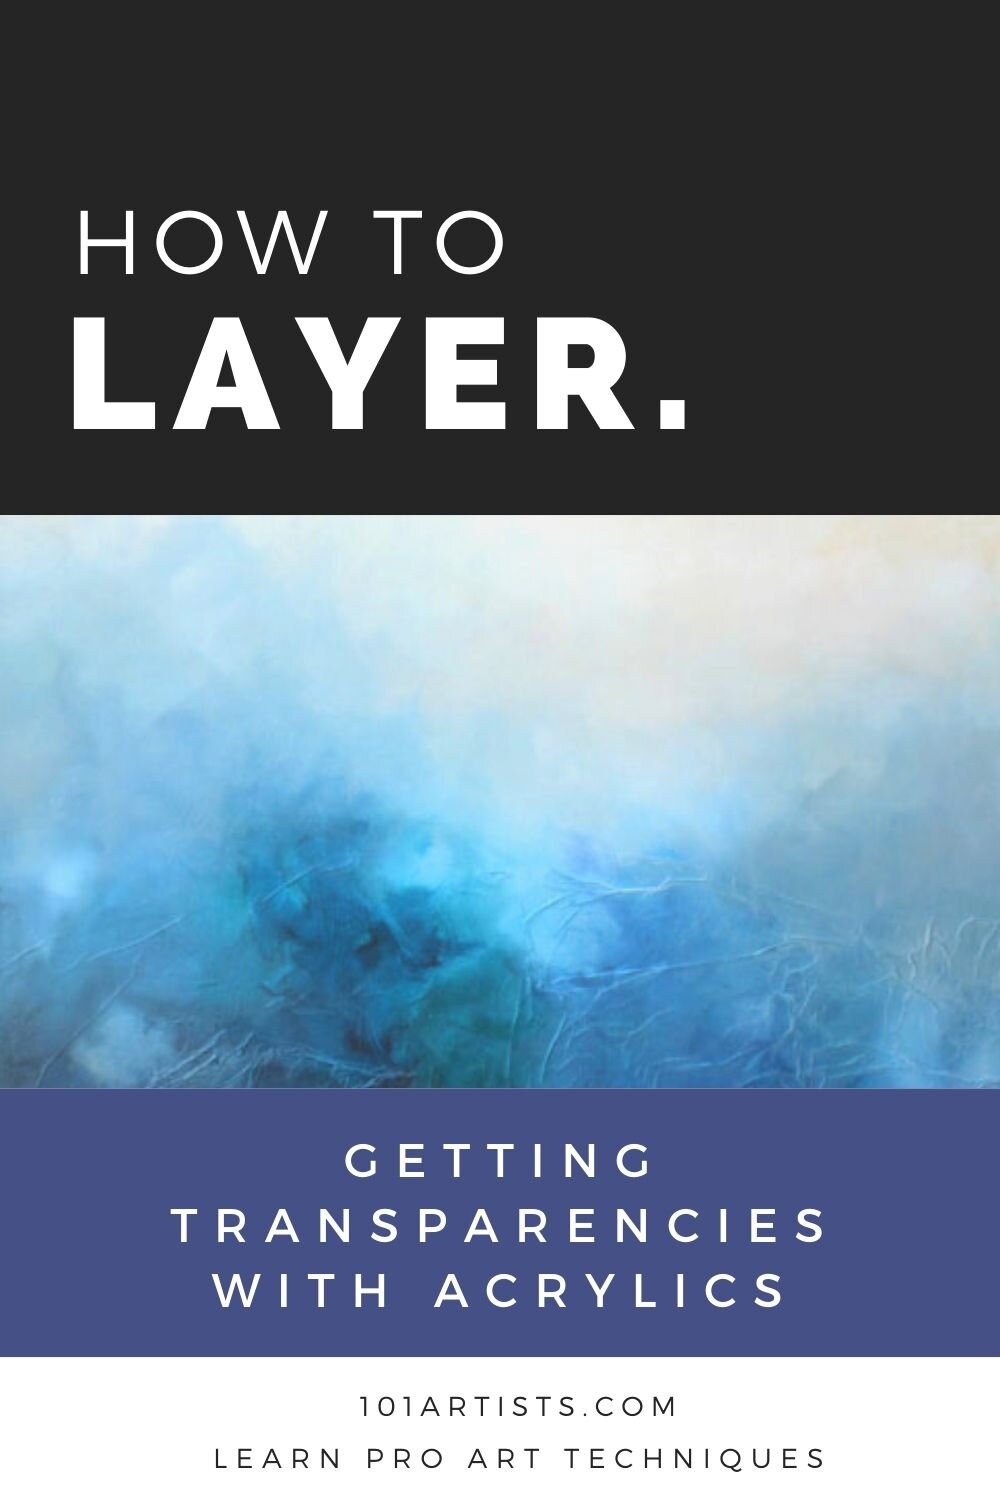
How to Layer with Acrylic Paint (Create Transparent Layers)
One the the very best things I did for my painting was to discover, and USE, mediums!
If you’ve taken any of my courses/tutorials, you know I use these frequenetly to build textures as well as create transparencies with acrylic paints.
Acrylics are great.
However, they can be pasty, thick, plastic-y and not that appealing when now laid down properly.
One of the reasons people love watercolors is because they are washy and transparent.
One of the reason people oils is because they are soft and blended (usually).
This is one thing that acrylics, left on their own, are not: Washy, soft, blended
That’s where the wonderful world of mediums comes in!
For example, the painting shown below, was created with a series of blues. A bit of white, a drop of cream, but mostly all blues. Yet it looks layered and varied and not just, well, blue.
CREATING TRANSPARENCIES WITH ACYLICS
It’s as easy as using the right mediums and simple application techniques!
I’ll go over a few step I took to create this painting. If you would like to learn to create the entire painting, join my step-by-step tutorial BLISS
SOME OF THE COLOR USED: Partial list
FLUID ACRYLICS WERE USED, EXCEPT FOR THE WHITE

PTHALO TURQUOISE
SOME OF THE MEDIUMS USED:
I like various brands, but these are links to the exact brands/items I use
Always coat your canvas in a coat or two of TITANIUM WHITE. I like the brand linked above. It’s inexpensive and works great, especially when used to coat a canvas!
Then I laid down a texture. I let this dry.
I started layering blues, using the acrylic glaze to mix them in various strengths before application. I let them DRY THOROUGHLY between layers (key!).
HOW TO FIX A TROUBLE SPOT IN ACRYLIC ART PAINTING
This is a section of this course; I ran into a trouble spot and I show you how I worked it out

General mixtures: SATIN ACRYLIC GLAZE
1/2 glaze : 1/8 pigment = very light transparencies
1/2 glaze: : 1/4 pigment = deeper transparencies (and so on)
For gloss glazes, you can use the ratio above or add just a little gloss to the satin glaze mixture to give it a little glossy luster. If you want a LOT of gloss, just omit the satin and use gloss glaze alone!
I used each layers in a small section of the canvas, giving sections a “pop” of the color.
When done, I gave it a layers of my glazing “final” coat:
3/4 Satin glaze + 1/4 Gloss glaze + a little water (just a tablespoon or two)
Mix well and apply over the full dry painting with a flat brush. Let dry.
Varnish.
My favorite way to varnish a large canvas is with a spray varnish - outside! This stuff works great but it needs to be used in a very well ventilated area, or outside!

My favorite varnish is Winsor & Newton Satin Spray Varnish
I apply one coat horizontally across canvas. Cover all spots well. Let dry.
Turn canvas and then apply another coat so the varnish hits vertically and horizontally.
Let dry really well.

BEST HOBBIES FOR BRAIN STIMULATION AFTER 50
Best Hobbies to Stimulate/Keep Brain Healthy Over 50
With Alzheimer’s, dementia, and brain fog on the rise in people over age 50, it is critical to find ways to stimulate the brain and keep it healthy.
The best hobbies to stimulate your brain and keep it healthy over age 50 include:
Physical exercise
Puzzles
Learning a language
Playing an instrument
Owning a pet
Meditating
Reading
Science has proven that there are plenty of hobbies to keep your mind sharp – choose one or two that sound the most appealing to you. It shouldn’t be a chore to stimulate and keep your brain healthy over 50. Let’s talk more about how each of the above hobbies change the brain for the better.
Physical Exercise
Research has shown that consistent physical exercise benefits brain health and mood. Exercise is linked to a lower risk of dementia.
This study examines the effects of physical activity on cognition. It concludes that after a bout of physical exercise, subjects show improved executive functions, better moods, and decreased stress levels.
Regular physical activity seems to improve blood flow to the brain. Other research suggests that exercise facilitates cell functions by generating oxygen and delaying the onset of dementia. Exercise reduces inflammation and stimulates brain cell growth in the brain, promoting the release of essential chemicals and the healthy function of blood vessels.
Other health associations: Diabetes, cholesterol, and high blood pressure are linked to dementia, Alzheimer’s, and brain fog, so that may be largely why regular movement is so important to brain health. Physical exercise also wards against depression, another condition that is linked to Alzheimer’s. An overall sense of well-being is connected to having a healthier brain.
Tip: You don’t have to make a major lifestyle change to start working out. Don’t rush to the gym and make a commitment; you’re not sure if you can keep. Add 15 minutes of stretching, walking, weightlifting, or yoga to your day. You can get your exercise in at work or at home – a little bit every day will make a difference.
Puzzles
Two publications in the International Journal of Geriatric Psychiatry report that puzzles like Sudoku keep brains young. These studies show that older people who engage in Sudoku and similar puzzle games demonstrate problem-solving skills and short-term memories of someone 8 years younger than their actual age!
Based on this recent study, the more frequently that over-50s engage in puzzle games, the better their brains function.
Side note: Research on puzzle games show correlation with, not definite, causation of better brain health. However, what better way to protect your brain than by testing and using it?
Other puzzle possibilities include crosswords, jigsaw puzzles, and riddles.
Tip: Word puzzles keep the brain even younger than number puzzles do!
On a related note: Brain fog and dementia has weighing heavily on the mind of doctors, researchers, and scientists. They’ve created millions of brain training games to encourage healthy brain function, and they’re right at your fingertips!
What are brain training games? They are challenges that push various mental capacities, specifically designed to strengthen your brain function and ward off brain fog.
The phrase “use it or lose it” seems to be true in brain health. Brain training games are developed to allow you to “exercise” these parts of the brain that might slow down as you age.
Programs: Look up BrainHQ or Lumosity, who are well-established brain-game experts.
Learning a New Creative Hobby
Activities like learning how to paint or sculpt appear to have positive effects on the brain. Creative activities, like learning to paint with acrylics, are often associated with relaxation and working with the areas of your brain that stimulate your senses in new ways and help reduce cognitive decline.
Bolster your new hobbies with including friends and family to join you. You could plan for a brain or body-challenging activity (like taking a painting class or learning a new skill like cake decorating). That way, you double your brain-boosting benefits!
Research shows that emotional support that comes from socialization helps produce BDNF, which is a molecule that repairs the brain and helps the brain forge new connections. Add this to a creative fun project and increase both socialization (a brain-booster as we age) and work you brain in new and different ways!
Tip: If you’d like to expand your social circle online, try joining a group on social media to share photos of your creative efforts and get fun feedback from others who are in the same mind-set!
Meditating
A study published in Neurolmage showed that for one year of meditation in subjects over 50, the subjects got one month and 22 days off the age of the brain. Now those are some precise results!
The practice of meditation increases cell production and synapse formation, keeping your brain buzzing. The overall results of the study showed that regular meditators had brains that were about 7 and ½ years younger than their non-meditating counterparts.
How to start: Repeat, refocus, and recenter. Pick a mantra or phrase that centers you or betters you. Take just a few minutes each day to repeat the mantra to yourself, continually refocusing on the same thought. Center yourself and enjoy the present moment.
Tip: Just 25 minutes of mindfulness meditation each day can boost cognitive abilities, emotional responses, and recurrent thinking patterns. Meditation isn’t all hype – it can be life (and brain) changing.
Playing an Instrument
Triangle or trombone, it doesn’t matter which instrument you choose! Learning or practicing an instrument strengthens the nerve fibers in the brain. Playing an instrument specifically impacts the corpus callosum, which serves as the bridge that connects the left and right brains.
This study published in 2012 showed that the corpus callosum in musicians was far larger than those in non-musicians.
Playing an instrument relieves stress helps you feel accomplished, and improves your memory and creativity.
Tip: You’re never too old to start playing a new instrument. Think of the instrument you’ve always wanted to learn and go for it. You could hire an in-person teacher, get online lessons, or teach yourself with some help from YouTube.
Learning a Language
Italian researchers proved in an Alzheimer’s study that learning a language helps us build cognitive reserve. Those extra connections help keep brain fog and dementia at bay.
Dr. Thomas Bak found that young adults who proficiently speak two languages perform better on attention tests and have better concentration than those who speak only their native language. Bilingual young adults also showed the ability to ignore irrelevant stimuli and focus on the most important information.
This attention mechanism is exactly what many Alzheimer’s drugs targets. If improving attention and concentration slows the progression of Alzheimer’s, learning a language is an ideal way to keep your brain young!
Tip: There are so many ways to learn a language nowadays. Google Duolingo, Busuu, Memrise, and BBC Languages. Find out which tools are right for you.
Owning a Pet
Establishing emotional bonds with a pet will activate your brain and boost your mental health. There is a reason why therapy animals are life-altering for so many people.
Marwan Sabbagh, MD, explains that petting an animal decreases cortisol and boosts serotonin, which elevates mood and reduces blood pressure and heart rate. The calm and joy that pets can bring seems to go a long way in keeping the brain healthy. It activates many of the same parts of the brain that socializing does, fortifying you emotionally and mentally.
A lonely brain is an unhealthy one.
Tip: Choose the pet that makes sense for you. Dogs are excellent companions but are higher-maintenance than cats or guinea pigs. If you are interested in getting a dog, some of the best breeds for better mental health include golden retrievers, labs, poodles, and Pomeranians.
Learn how to paint upscale abstracts
Guide step-by-step classes
Beginners welcome!
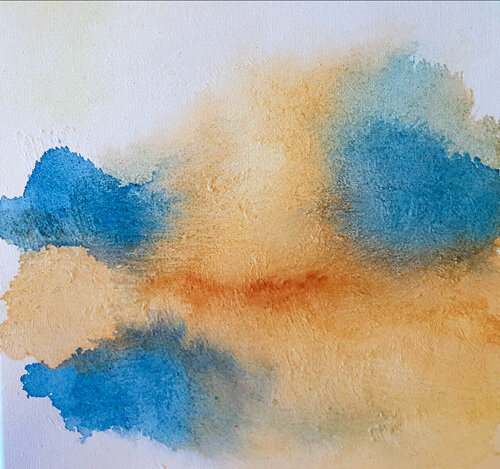
Watercolor Effect with Acrylics - HOW TO
For those of you looking for a quick art technique:
WATERCOLOR ACRYLICS
Acrylics that act like watercolors
This muted autumn abstract landscape looks like watercolor.
But...it's actually acrylics on canvas! How did I get the effect?
A layer of ABSORBENT GROUND. Let dry.
Then a layer of FIBER PASTE. Let dry.
This will give the canvas "tooth" and some nubby texture that a wash of acrylics will flow over like watercolors! I mixed the acrylics with some water (a small amount) plus acrylic glazing medium (SATIN).
You can build up layers of color (let dry in between).
Finish with a layer of glaze (use the same SATIN glaze). Let dry.
Varnish to protect.
It's one way to get a surface that will accept the acrylics like a watercolor, with a lot of flow and wash.
LEARN HOW TO PAINT WITH ACRYLICS - LIKE A PRO!
SUPPLIES
What I used to create this exact painting:
ABSORBENT GROUND
https://amzn.to/3mSp3Ve
FIBER PASTE
https://amzn.to/364WcXZ
SATIN ACRYLIC GLAZING MEDIUM
https://amzn.to/3crZPbL
SMALL CANVAS
https://amzn.to/305T4ai
FLAT BRUSH
https://amzn.to/2G8O8uc
I used a different brush, but this one looks great!
*The affiliate links I include are of the exact products I used.
How Should I Seal An Acrylic Painting (Archival)?
Best Ways to Seal an Acrylic Painting
Leaving the protection of an artist’s artwork up to chance is not a smart idea especially when considering acrylic paintings. These paintings are susceptible to dust, dirt, and other things that could ruin the painting. The best way to avoid ruining an acrylic painting is to apply sealant to your painting.
The best ways to seal an acrylic painting is to use an acrylic resin varnish, acrylic polymer varnish, clear sealer, or mod podge, depending on the surface you are painting on.
To avoid confusion, the word varnish can be used to refer to a traditional, oil-based finish or a general term for any finish. In this article, varnish will be used as a general term to mean “protective coat”. Let’s dive in.
Why Would I Need to Seal An Acrylic Painting?
Whether you plan to sell your artwork or keep it for yourself, you should consider sealing your work with some sort of varnish when you get finished. Just because the paint on your canvas has dried, that doesn’t mean that your artwork is going to keep that same look without any protection.
Sealing your painting with varnish will protect your artwork from yellowing over time. Varnishing your art will also protect your work from UV rays, dust, and other natural elements that can alter the look of your work.
Even if you are not concerned about protecting your finished work, a coat of varnish will give your painting a fresh and professional look that will last a long time. It is also completely okay to choose to not seal your acrylic painting, especially if you are not sure if you want to paint over it in the future.
How to Seal an Acrylic Painting
To properly seal an acrylic painting, you will need to decide on a varnish, a finish, and an application style. Let’s go through each of these categories:
What Type of Varnish Should I Use?
The specific type of varnish you need will be determined by the surface you are painting on. For canvas paintings, you should be choosing between acrylic resin varnish and acrylic polymer varnish.
Acrylic Resin Varnish
Resin varnishes are great if you are looking to give your painting a glossy finish, and this type of varnish tends to be stronger and clearer than polymer varnishes.
However, you will need to apply an isolation coat to your painting before you apply the varnish to avoid a cloudy appearance. This step is especially crucial if you plan on using satin or matte varnish.
One major disadvantage of using resin varnish is that these solutions are toxic if inhaled, so you must make sure that you are working in a well-ventilated space. You also have to use mineral spirits to clean your brush when you are done.

LEARN TO PAINT LIKE A PRO! Guided step-by-step classes
https://www.101artists.com
CREATE CLOUDWIND - shown above
Acrylic Polymer Varnishes
You may find that artwork with a layer of polymer varnish applied to it may not be as vibrant and glossy as artwork with resin acrylic applied to it.
But, polymer varnish is non-toxic, so you do not have to worry about the ventilation of your workspace. You can also use regular soap and water to wash your brushes.
Clear Sealer for Wood Surfaces
If you are using acrylic paint on wood, in order to seal it, you have to use a clear sealer or a wax-based polycrylic sealant. This type of sealant is non-flammable and typically has very little odor, so you will not likely have to be concerned about the ventilation of your workspace.
Polycrylic sealant does not require a special solution for cleanup and can be washed away with regular soap and water. This sealant is safe to use to seal artwork on wood, but it is good practice to do a test section before you seal the entire artwork.
Mod Podge
If you are an artist who uses acrylic paint on a variety of surfaces, mod podge may be the best option for sealants for you. Just as water is the “universal solvent” to chemists, mod podge is considered to be a “universal sealant” of sorts. You can use it to seal acrylic paint on anything from paper to metal or even fabrics.
Mod podge is also extremely safe to use anywhere as it is non-toxic, non-flammable, and can be easily cleaned up with soap and water.
This sealant has a variety of finishes, so you have the same ability to choose the type of finish that you want. You also have the ability to choose between brush-on application and spray-on application.
Mod Podge is a very popular varnish brand so you can find it pretty easily online and in brick-and-mortar stores.
Clear Coat Acrylic Sealant
Clear coat acrylic sealant is very similar to the clear sealer for wood. It doesn’t add a yellow tint to your artwork. Clear Coat also protects your artwork from smudges and moisture.
The big difference between the two is that Clear Coat can be used on a variety of surfaces.
Acrylic Glaze
One alternative to using a varnish would be to use an acrylic glaze. Acrylic glazes are just simply translucent paint.
Despite the simple description, glazes are known to transform paintings and give them a life-like appearance.
Glazes tend to be watery, so it is important that you are attentive during the application process.
Different Ways to Apply Varnish
There are a few different characteristics of varnishes that you should consider especially if you have a specific type of finish in mind:
Brush-On vs. Spray-On
There are two application methods for coating your varnish on your work. You can either apply the varnish with a brush onto your work or you can spray the varnish onto your work.
Of course, there are advantages and disadvantages to both, and what you decide to use can be determined by your personal preference as there is not a significant separation in quality.
Brush on varnish gives the applicant a greater feeling of control than the spray, but the spray-on varnish does allow for a more even application. If you want to save time during the application process, the spray-on varnish is the way to go.
If you decide to use spray-on varnish, be aware that it may be more difficult to purchase as brush-on varnish is more commonly used and produced.
What Type of Finish Do You Want?
There are three types of finishes you can choose for your painting: glossy, satin, or matte.
Depending on the look you are trying to achieve with your artwork and the surface you are painting on, the type of sealant you use will vary.
Glossy sealant → use for a vibrant finish that will make your colors pop
Matte sealant → use this if you don’t want your painting to have any glare
Satin sealant → a medium between the matte and glossy finish
Matte varnish is best for someone who wants to seal their artwork without a shiny look. This type of varnish is also known to soften the colors of your painting.
On the other end of the spectrum, a glossy varnish will often bring out the pigments in your work, making the colors more vibrant.
A satin varnish is a happy medium between a glossy and matte varnish. Satin varnishes typically create less glare than a glossy varnish. Satin varnishes are also known to lighten dark colors as well as soften the pigments overall.
If you are not sure if these varnishes will give you the finish that you want or if you want a finish that falls in between two types of varnish, you can mix two or more of the varnishes to get your desired finish.
Choosing the Right Sealant for You
Sealing an acrylic painting can protect precious artwork for years to come. Choosing the right one takes a little bit of time to make just the right choices for your artwork. What did you choose to seal your painting with? Share in the comments below what you chose and why!

FAQ: Beginner Art Painting with Acrylics: Glazes, Texture, Blending
How long should acrylic glazes dry before painting over them?
A: Acrylic glaze mediums should dry thoroughly, a minimum of 24 hours, before attempting to paint over them.
How long does it take to complete a painting using acrylic painting mediums?
A: You are generally looking at anywhere from a few days to weeks. It all boils down to how many layers are used and the look you are going for in the paining.
Why is it important to wet the canvas when applying a layer?
A: Wetting the canvas makes it easier for the paint to flow. You’ll always want the paint to flow across the canvas so that the color layers are subtle and well spread out.
What mediums can be used for an acrylic painting?
A: You can choose from many different mediums which allow you to vary the surfaces and textures. Some of the most commonly used are matte, pumice stone gel, gloss medium, varnish, glazing liquid, crackle paste, and matte acrylic painting gel.
How to apply a texture?
A palette knife or similar tool is usually best.

Why does the paintbrush stop blending color?
A: It generally happens when the brush gets wet. Painting with acrylics often requires changing brushes, and so you can switch to a utility brush to continue blending color.
Is water a good pouring medium?
A: Acrylic painting may require water to dilute the paints. While this works well, it isn’t the best option for acrylic pouring. Water tends to change the consistency, the pigment density and adhesion qualities of the paint so you’ll want to be mindful of that.
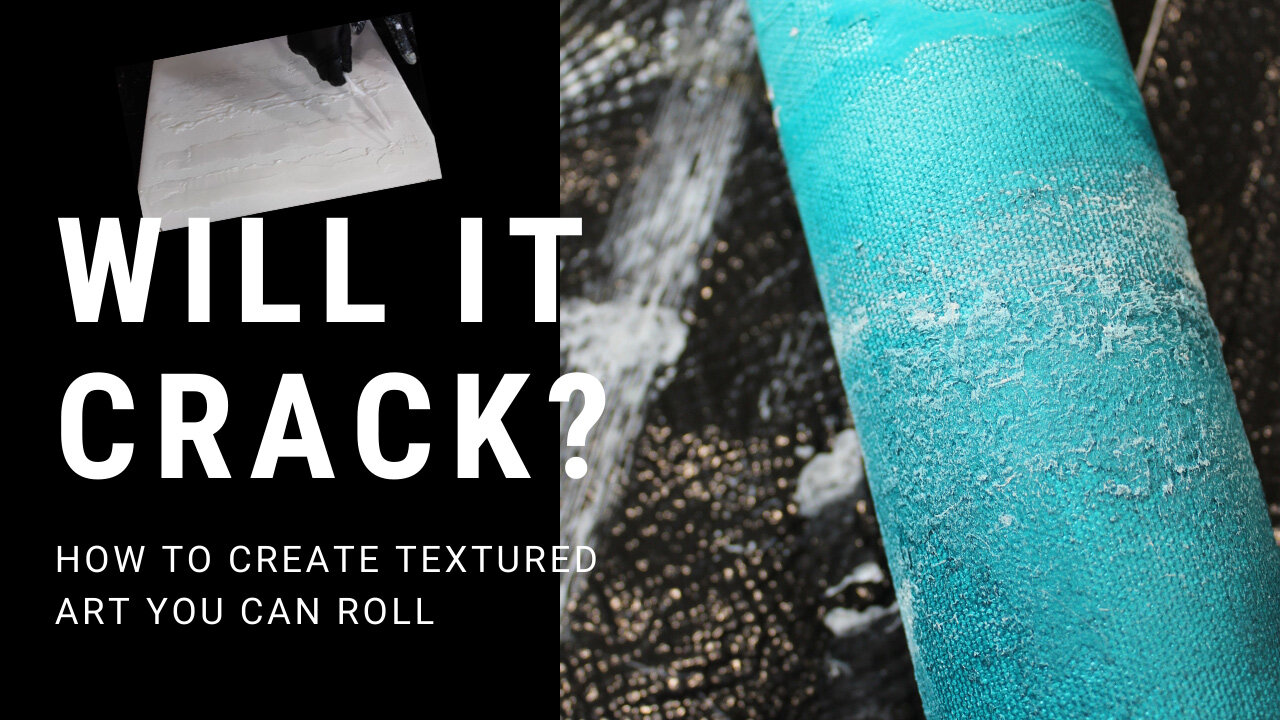
Will Acrylic Texture Medium Crack on Unstretched Canvas? FAQ
Will it Crack?
How to Paint Textured Art for Rolled Canvas
Will Acrylic Texture Medium Crack on Unstretched Canvas?
If you want to work with different mediums to create different textures on a canvas, it’s fine until you have to roll them, as they can easily crack and spoil the overall design of your painting.
You might have to roll your canvas for shipping or storing, and so the texture medium you decide on, when working with the canvas, is essential to avoid this kind of damage.
There are a number of textures that can be used for different overall effects on the canvas, and these include pastes and gels.
When you start working with a canvas, you must ensure it is stretched as much as it can be so that it is incredibly taut within its frame to avoid cracking the texture medium later.
Different pastes are chosen because of the movements they leave on the canvas, as well as their ability to help prevent cracking once dried. These include modeling paste, which is a great favorite, as it can make magnificent peaks and troughs on the canvas, which creates an impressive design, and fibre paste, which makes a washy watercolor effect when painted.
Gels are thinner and can include string and absorbent ground, which is more of a paper-thin effect, which usually needs more than one layer and can build up a beautiful tooth on your canvas.
Heavy gel gloss is used as well to give peaks – it’s a great texture to work with because it’s so flexible and is a good medium to finish off with before using the acrylic paints on the canvas.
Let the canvas dry with the different textures over 24 hours, then lightly paint and allow to dry again.
Basically, you use these different textures in various layers to create the desired effect. You want for your canvas.
Between layering the different pastes or gels for the raised texture and letting them dry, you can paint the acrylic paints, powders, and glazes on to create the background color.
Allow time for drying in between each texture and paint application.
So try and ensure you:
Always work on a rigid, totally stretched surface
Use mediums with a flexible ability and do your own tests – your producing pieces of artwork which may need to endure the test of time, including different temperatures as well as being rolled and stored.
It’s a great idea to experiment with different mediums that you like – professional products are expensive but are far more endurable.
Therefore to ensure you only have cracks in your canvas where and if you want them, it’s a good idea to get used to the different textural mediums out there, before you work on a masterpiece.
LEARN TO PAINT LIKE A PRO!
STEP-BY-STEP PAINTING CLASSES
Questions and answers for using acrylic texture mediums:
1. What happens to a canvas if external, environmental factors such as temperature, aren’t taken into consideration?
Answer: Light, heat, and moisture can have a seriously detrimental effect on canvases which can cause the painting to crack, especially if shipped or rolled or not stored properly.
2. Once you have stretched your canvas, what should you treat the canvas’ surface with before acrylic paint is applied?
Answer: You should prime the raw surface of the canvas with titanium white, for example, as it seals the surface before you use different mediums to create texture.
3. What acrylic textures can you use on roll and ship or a raw canvas?
Answer – Modelling paste is popular if you are happy to have tiny cracks because as it has a rigid structure – if the canvas has been well stretched, it can take modeling paste as the paste can withhold cracks, which can add to the texture and overall effect.
Extra heavy gel - anything with gel in the title is going to be a more flexible structure, which is less likely to crack if the canvas is going to be shipped. Opaque and white – more plastic in its look, but this is a great medium to use.
4. Why is it not recommended to use a brush when laying down the acrylic textured mediums on your canvas, and what should you use?
Answer: You should avoid using a brush, especially a fine brush, as it can shed its fibers when layering the canvas with different texture mediums and instead use a palette knife. This is because the thickness of the pastes and gels used can help create various textures with a knife.
5. What should you use to create washy, watercolor effects on your canvas with mediums for acrylic painting and texture?
Answer: For a thin layer of absorbency, you should use layers of fiber paste – let it dry and then apply paint.
Can you roll canvas with acrylic texture mediums?
In my video WILL IT CRACK? I discuss and show a variety of texture mediums for acrylic painting.
We let them dry and then roll the canvas to see what happens!
Textures used:
Heavy Gel / Extra Heavy Gel
String Gel / Tar Gel
Raw Primed Canvas Roll (unstretched)
*Affiliate links included.
SEE MORE TUTORIALS ON MY YOUTUBE CHANNEL
TAKE FULL GUIDED STEP-BY-STEP PAINTING CLASSES
ART TECHNIQUES FOR BEGINNERS
STEP-BY-STEP GUIDED BEGINNER ART - HOW TO PAINT WITH ACYLICS
PAINTING AN ABSTRACT TEXTURED LANDSCAPE
Creating a Neutral Abstract Landscape Painting
Summary:
The first step to creating a neutral abstract landscape painting is to prep the canvas, aka the background. The best part is if you’re a beginner, and especially if you’re trying your hand at abstract art, you don’t need a super fancy canvas as often robust paper is more than good enough.
We want the background to be a combination of titanium white and light gray, which adds definition and is pretty standard practice for painting with acrylic glaze mediums. To do that we use glaze and shade pigments. We’ll need a transparent oxide and shade grey color.
The background color is prepped by mixing some transparent brown oxide with the glaze paint. The combo color can then be applied to the wet canvas. Some of the color will flow, which is fine because we want it to blend. We’ll also want to avoid seeing any brushstrokes and a tonne of color. A mop brush can be used to spread the color across the canvas and to prevent brush strokes. Then allow it to dry.
Subsequent layers of subtle colors mainly a mixture of ceramic, black and some bronze will help to define the landscape.
After you’ve applied multiple layers, its time to add the texture to outline the horizon. Now the texture can be applied prior, but in this case, it can be done above the darker layers. The texture can be further highlighted by using some black. We can use the same black across the edges of the canvas to give it a more pronounced look.
AFFILIATE LINKS - THESE ARE PRODUCTS I USE/RECOMMEND:
CANVAS https://amzn.to/3dO9nwP
Flat brush https://amzn.to/3gaMSna
Mop brush https://amzn.to/2Vya2Mq
Modeling Paste https://amzn.to/2AiZcm1
High Flow Acrylics:
Shading Grey https://amzn.to/2YNpyGo
Transparent Brown https://amzn.to/31JaGe7

How to Paint with Acrylics _ Beginner Abstract Art Techniques for Textures
How to paint with acrylics (like a pro) for beginners.
Read MoreCreating textured abstract art - neutral metallic modern painting art tutorial
SILVER TO THE TOUCH abstract art tutorial - guided, self-paced class. Beginners welcome!
https://www.abstractart.live/art-tutorials/art-tutorial
Read MoreBeginner Abstract Art Painting - Creating a Layered Ethereal Textured Artwork - Step-by-Step Tutorial
Beginner Abstract Art Painting - Creating a Layered Ethereal Textured Artwork - Step-by-Step Tutorial


SUNRISER
How to Paint with Acrylics - Using Tools - Palette Knife, Catalyst, Mop Brushes
SEE THE ENTIRE PROCESS & GUIDE STEPS
https://101artists.com/abstract-sunrise-step-by-step-acrylic-art-tutorial-demo/
Full materials list, too!
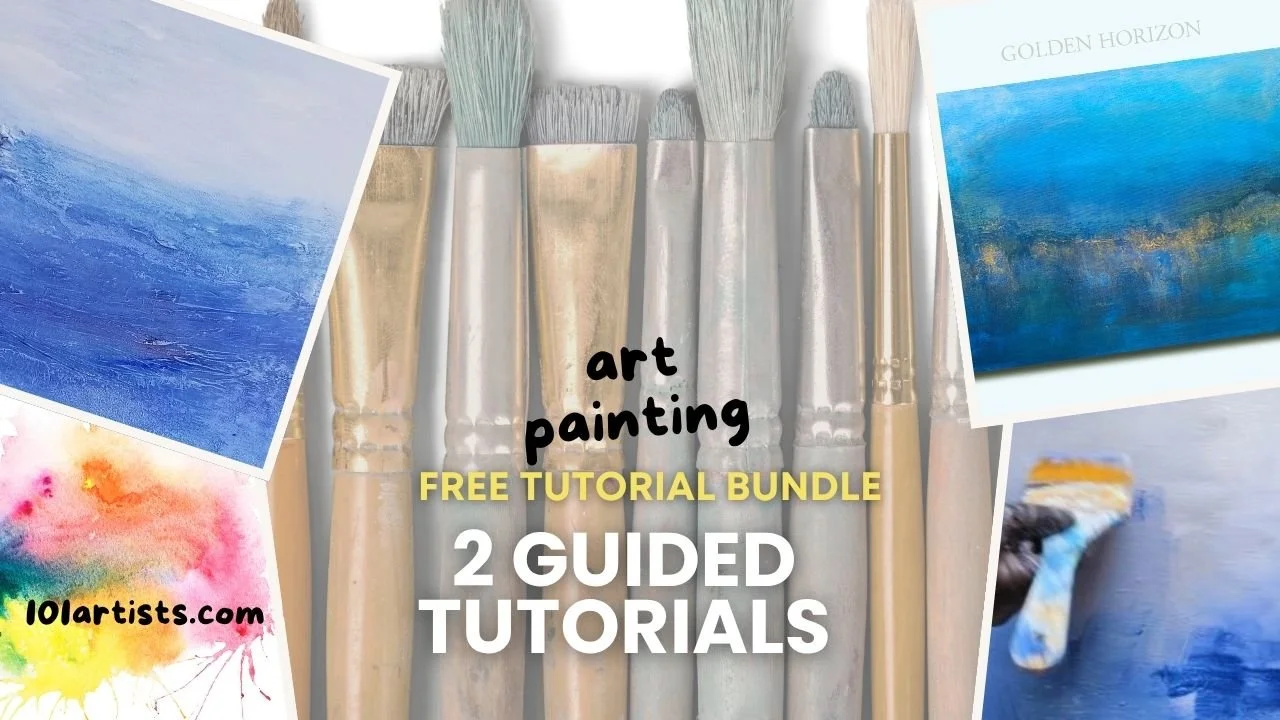
GET MY FREE 2-TUTORIAL BUNDLE
Beginner Art Techniques - Tips for Painting with Fluid Acrylics
CREATOR QUICK TIPS:
Fluid Acrylics - Tips for Painting with Fluid Acrylics
In my tutorial I use a few different types of paint, one being fluid acrylics. Here are a few tips for working with these fun, washy acrylics:
DO:
Understand their depth. Fluid acrylics will lay down intense color, but it will be a washed-effect vs. any impasto or heavier paint. It's like a heavy watercolor!
Prep your canvas. As I said, these will lay a washy color on your canvas so be sure you have it prepped and know they will not "build" a lot of surface, so have that in place before you lay them down.
Stay in a color zone. Too many colors = muddy. Choose a palette and then work in that zone for a modern look. (I know I'm a broken record, but it's for good reason!)
DON'T
Be afraid to make your own. No fluids or high-flows on hand? Make your own. Just get some airbrush or high-flow medium and mix up your own colors!
Have fun, be well, be safe!

Not exactly an abstract, but with components from abstract painting techniques.
How to Create Abstract Stencil Art
Create interesting and unique art with acrylic paint and stencils.
Read MoreCan you roll canvas with acrylic texture mediums?
Can you roll textured acrylic art paintings?
Read MoreSimple Tips for Storing Original Art
How to store original art safely.
Read More